Indoor Growing
In this guide, we will walk through the steps to grow an 8-week indica strain in soil from seed to harvest. We will also cover tips and recommendations for pruning, planting, lighting, pot sizes, final yield sizes, and curing.
Before starting, it's essential to ensure that you have the right equipment and setup to create an ideal growing environment. For a 12x12 room, we recommend using at least a 600-watt HID grow light or equivalent LED grow light, a carbon filter to control odor, an exhaust fan to control humidity and temperature, and a reflective grow tent or poly cover on the walls and ceiling to maximize light efficiency.
Day 1: Germination
The first step in growing cannabis is germination. Start by soaking the seeds in water for 24-48 hours until they crack and show a small white root tip. Plant the seeds in small pots with soil, tap root down about 1 cm below the soil, cover with dirt, and keep them moist but not too wet. Cover the pots with plastic wrap to create a humid environment, and place them under the florescent grow light. Florescent lights are lights that do not give off any heat so you may position this as close as 4 inches above your seedling pots.
Day 3: Seedling Stage
In about two days, the seeds should start to sprout, and the seedlings will begin to emerge. Once the seedlings have two or three sets of leaves, transplant them into larger pots, ideally 3-gallon containers. Keep the plants under the grow light for 18 hours a day and 6 hours of darkness. Depending on how many plants you are growing, because of the new pot size you may need to add more florescent light, as your seedlings are not ready for HPS light at this stage.
Also note - Pot sizes are a growers preference and many people like to grow bigger plants in 5 and 7 gallon containers. In 3 gallon pots, you can expect between 1.5 and 2.5 ounces per plants typically of dried cannabis flower at harvest, while in a 7 gallon pot experienced growers can expect up to a half pound.
Day 10: Vegetative Stage
During the vegetative stage, the plants will begin to grow rapidly. Once the plants have reached a certain size (usually around 12-18 inches tall), you can switch to HPS lights and start to use a vegative organic plant fertilizer to encourage and promote growth and plant strength further. Ensure that the plants receive at least 18 hours of light per day, and monitor the temperature and humidity levels in the room to ensure they are optimal. Prune any lower leaves that are yellowing or dying, and trim any shoots that are blocking the light from the lower branches.
Day 30: Pre-flowering Stage
Around the 4th week, the plants will enter the pre-flowering stage, where they will begin to show their sex. If growing from regular seeds, this is the time to separate male plants from females. Female plants will produce the buds we want, while males will produce pollen and seeds, and can potentially pollinate female plants.
You can start to identify the sex of cannabis plants during the pre-flowering stage, which usually occurs about 4-6 weeks after germination. At this stage, look for pre-flowers, small structures that appear at the nodes where the branches meet the main stem. Male pre-flowers will have small balls (pollen sacs) that grow in clusters, while female pre-flowers will have small, white, hair-like pistils emerging from a bulbous calyx.
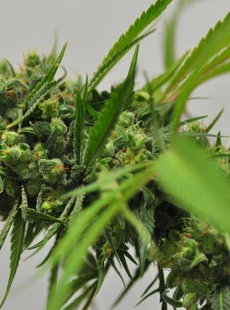
Day 45: Flowering Stage
Once cannabis plants enter the flowering stage, it becomes much easier to determine the sex. Male plants will continue to produce pollen sacs, while female plants will develop larger, more elongated calyxes that will eventually become buds.
The flowering stage is when you change your light cycle as well as your fertilizer from veg to bloom to start triggering the plants to start to produce buds. Indica strains usually take 8 weeks to flower, so it's crucial to ensure they receive 12 hours of light and 12 hours of complete darkness per day to trigger the flowering process. Monitor the temperature and humidity levels closely, as they can significantly affect the plant's growth and quality.
The timing of flushing a cannabis plant depends on a variety of factors such as the growing medium, the stage of growth, and the desired taste of the final product. However, as a general guideline, it is recommended to start flushing a cannabis plant about 1-2 weeks before harvest.
For an 8-week Indica strain, this would typically mean starting the flush process around week 6-7 of the flowering stage. During the flushing period, the plant is watered with plain water without any nutrients or additives to help remove excess nutrients and salts from the plant's tissues. This helps improve the taste and aroma of the final product, making it smoother and more flavorful.
While not using any more nutrients, at this stage your can give carbo boosts additives to add to the density and hardness of your buds. One way to do this is to mix in food grade Mollasses into your water while flushing. This really helps improve the taste and aroma of the final product and also increases final stage trichome production.
It's important to note that growers should monitor their plants closely during the flush period, as some strains may require a longer or shorter flush period depending on their individual needs. Additionally, growers should also adjust their watering and feeding schedules based on the specific conditions of their grow room to ensure optimal growth and yields.
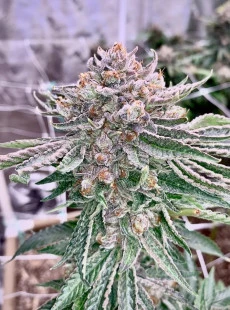
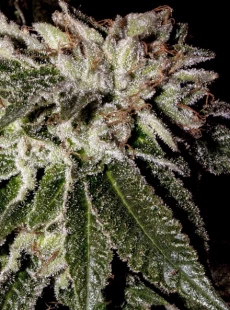
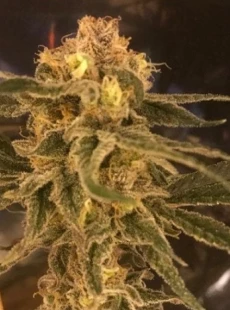
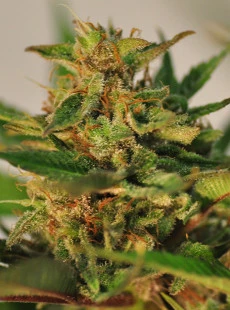
Day 60: Harvest
After 8 weeks, the buds should be ready for harvest. To check if they are ready, examine the trichomes on the buds. If they are 60% or more cloudy or amber-colored, it's time to harvest. Cut off the entire plant and hang it upside down in a dark, cool room with good ventilation for drying. Once dry, trim the buds and store them in airtight jars in a cool, dark place for curing.
Pruning
Pruning is an essential aspect of growing cannabis. It helps to remove any unnecessary branches and leaves that may be blocking light from the buds. We recommend pruning regularly throughout the vegetative stage, and during the flowering stage, only remove any yellow or dying leaves.
Curing
Curing is the final stage of the growing process and is crucial to ensure that the buds are properly dried and preserved for long-term storage. To cure the buds, place them in airtight glass jars and store them in a cool, dark place for at least two weeks. During this time, the buds will release any excess moisture and continue to develop their flavor and potency.
To properly cure the buds, open the jars once a day for the first week to allow any excess moisture to escape, and then every few days after that. If you notice any mold or mildew forming on the buds, remove them immediately and increase the airflow in the curing room.
After two weeks, the buds should be fully cured and ready to enjoy. Store them in a cool, dark place, away from direct sunlight and heat sources, to preserve their flavor and potency for as long as possible.
Grow Room Considerations
Planting too many plants in a small space can lead to overcrowding and reduce the yield and quality of the buds. It can also make it harder for you as the grower to water, feed, and prune your plants. For indica strains grown in 3-gallon pots, we recommend leaving at least 1-2 feet of space between each plant to allow them to grow and flourish.